
Showing posts with label food storage. Show all posts
Showing posts with label food storage. Show all posts
Friday, September 5, 2014
Food Storage - Wendy DeWitt
I think this is a great video on food storage. My mom wanted to see this video so I am sharing it with all so she has easy access. Hope you enjoy it.
Wendy has written two books Everything Under the Sun and Everything Made Simple. They are food storage plans for a year. A 'how to' in a simple manner. So if you would like to do food storage this is a simple way to get started.
I am not LDS but they have some great information regarding food storage and they are generous to share this information with all. I thank Wendy DeWitt for sharing her knowledge and books free of charge.
My mom also had some questions about a gamma seal lid. I use these on my flour and rice because they are easy access.
a little bird

Monday, March 10, 2014
A Guide to Food Storage

Click the link below to get your free download from Utah State University Extension.
A Guide to Food Storage for Emergencies Food Storage for Emergencies
Food and Water Storage
| Prepare for adversity by storing an emergency supply of food and water. Earthquakes, fires, severe storms, and power outages are just some of the potential emergencies we may encounter. Imagine that you have no electricity, no gas, no water and no telephone service. What would happen if you are told to evacuate your home in the next ten minutes? Imagine that all the businesses are closed and you are without any kind of emergency services. What will you do until help arrives? The 3 day emergency food and water supply is meant to be a quickly accessed, portable source of food and water that can sustain you and your family for several days. It should be stored in one or two containers for quick portability. The foods chosen should be ready-to-eat without the need for cooking. The 3 week/ 3 month emergency food and water supply are meant for a disaster where food and water delivery may be interrupted. Hurricane Katrina was a perfect example where the normal delivery of food was interrupted. Build a small supply of food that is part of your normal, daily diet by purchasing a few extra items each week. Expand on this until you reach your goal. Not all of these foods will be ready-to-eat and plans must be made to store the necessary means to prepare them. |
Thursday, March 6, 2014
Master Food Preserver Class
Yesterday I attended a master food preserver update. We always come away with new information!!
I thought I would share some of what we talked about.
Have you ever had dry products on the shelf go bad? Years ago I went to make oatmeal pulled the bag out and it was 'alive'. I know that is GROSS but true. There had been an insect hatch. It took all I had not to vomit on the kitchen floor as I took the whole lot to the dumpster outside. I also had the same happen with brown rice. Container and all went straight to the dumpster!!!
Since then I have started using the freezer as a protection against that. I don't keep the items in the freezer forever but leaving the product in for a time period.
Yesterday we learned that the time period in the freezer is 4 days. (I normally do a full week, but it's great to know that 4 days is enough.)
We also learned that the oven can be your friend in preventing a bug problem in your dry items too.
Heat the product (oatmeal, rice, wheat, barley, etc whatever dry product you are storing). 1.5 hours at 200 degrees. You can spread the product out on a baking sheet or you can put it in your storage jars and place them in the oven. You want the commodity to reach a core temperature of 150 degrees for 30 minutes. This will kill any insect eggs present. (Actually this will kill any life stages (egg, larvae, pupae & adult) but if actual bugs are present my recommendation is to toss the lot.)
I thought I would share some of what we talked about.
Have you ever had dry products on the shelf go bad? Years ago I went to make oatmeal pulled the bag out and it was 'alive'. I know that is GROSS but true. There had been an insect hatch. It took all I had not to vomit on the kitchen floor as I took the whole lot to the dumpster outside. I also had the same happen with brown rice. Container and all went straight to the dumpster!!!
Since then I have started using the freezer as a protection against that. I don't keep the items in the freezer forever but leaving the product in for a time period.
Yesterday we learned that the time period in the freezer is 4 days. (I normally do a full week, but it's great to know that 4 days is enough.)
We also learned that the oven can be your friend in preventing a bug problem in your dry items too.
Heat the product (oatmeal, rice, wheat, barley, etc whatever dry product you are storing). 1.5 hours at 200 degrees. You can spread the product out on a baking sheet or you can put it in your storage jars and place them in the oven. You want the commodity to reach a core temperature of 150 degrees for 30 minutes. This will kill any insect eggs present. (Actually this will kill any life stages (egg, larvae, pupae & adult) but if actual bugs are present my recommendation is to toss the lot.)
Monday, August 6, 2012
Zucchini Soup
Perfect for this time of year. Do you have zucchini everywhere?? If so here is a way to put them by for this winter.
Click to link to the recipe.
CANNING
Recommendations for canning cubed or sliced zucchini (considered a summer squash),
have been withdrawn due to uncertainty about the determinations of safe processing times.
Squashes are low-acid vegetables and require pressure canning for a known period of time that
will destroy bacteria caused by botulism. Science-based documentation for the previous
processing times cannot be found, and reports that are available do not support the old process.
Due to this, IT IS NOT RECOMMENDED THAT YOU HOME CAN ZUCCHINI.
I made this soup and it was wonderful. Since it is no longer recommended to can zucchini I put this in the freezer.
Click to link to the recipe.
CANNING
Recommendations for canning cubed or sliced zucchini (considered a summer squash),
have been withdrawn due to uncertainty about the determinations of safe processing times.
Squashes are low-acid vegetables and require pressure canning for a known period of time that
will destroy bacteria caused by botulism. Science-based documentation for the previous
processing times cannot be found, and reports that are available do not support the old process.
Due to this, IT IS NOT RECOMMENDED THAT YOU HOME CAN ZUCCHINI.
I made this soup and it was wonderful. Since it is no longer recommended to can zucchini I put this in the freezer.
Saturday, July 28, 2012
Painless Preservation
Green Beans are a great candidate for the dehydrator. They are a low acid so to be home canned they must be pressured canned. Which is wonderful but a bit more time consuming than I want today. I have lots to do on my day off so saving time is important to me.
I picked our beans this morning and got about 2 gallons.
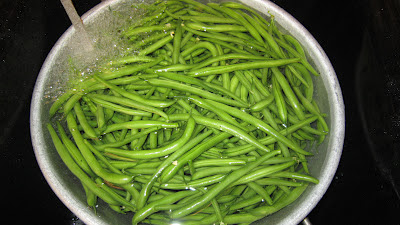


I picked our beans this morning and got about 2 gallons.
Then straight in to the house for a 'bath'.

Then into the steam blanch. For our altitude 4 minutes did the trick.

From the steam blanch...


... right to the drying trays.

Dry green beans until brittle.
For more information on drying fruits and vegetables go to:
Thursday, July 5, 2012
Raspberry - Grape Jam


3 cups of crushed raspberries
2 cups grape juice
(or a mix of the two to equal 5 cups)
1 package powdered pectin
stir together and bring to a full rolling boil
add:
7 cups sugar
stir and bring to a full boil again.
Boil for one minute - stirring constantly
remove from heat
ladle into your clean hot 1/2 pint jars
put your simmered lids and clean rings on to fingertip tight
process for 10 minutes in a water bath canner at sea-level.
Monday, July 2, 2012
Yogurt
Homemade yogurt is so tasty, healthy, and
fairly inexpensive.
I don't have a yogurt maker so I have had to devise a different way... Lets face it, people have been making yogurt - or cultured milk of some sort - for ages and they didn't have a yogurt maker either.
This is also a great thing to know if you are living off the grid or your power goes out.
I make my yogurt with powdered milk (rotating my food-storage) you could use regular milk too. I like to make a large batch. You can half this if you prefer just 1 quart at a time.
to use powdered milk:
2 quarts water into a large heavy pan
2 3/4 cups non-instant dry milk or 5 cups instant dry milk
Mix well, a wire whisk works great for this.

Or 2 quarts milk to heavy pan (add 1/2 to 3/4 cup dry milk for thicker yogurt and additional milk protein)
Warm on medium heat to 180 degrees (use a candy thermometer)
Now turn the burner off and allow to cool to 110 degrees

When the milk has cooled to 110 degrees
Add 1/2 to 1 cup yogurt starter
(This is plain yogurt from the store with live active cultures. The yogurt must say live active cultures or it will not work.)

Mix well., put the lid on and set in a warm place to culture. This can take 6 to 8 hours. The longer the tangier.
In the winter I set my pan out by the wood stove it stays all warm and toasty. In the summer I set it out in a bright sunny area where it will stay all warm and cozy. I say warm not hot. I take a thermometer out and set it next to my pan just to make sure it isn't getting too hot. Over 120 degrees and it will kill the cultures and you will just have bad milk.....
This makes a thick, almost Greek style yogurt. You can have for breakfast, put a spoonful on the dogs food, they love it and it is a dairy product they can have and handle, make frozen yogurt, make yogurt cheese, use it as a sour cream replacement. So many wonderful ways to use yogurt!!

I don't have a yogurt maker so I have had to devise a different way... Lets face it, people have been making yogurt - or cultured milk of some sort - for ages and they didn't have a yogurt maker either.
This is also a great thing to know if you are living off the grid or your power goes out.
I make my yogurt with powdered milk (rotating my food-storage) you could use regular milk too. I like to make a large batch. You can half this if you prefer just 1 quart at a time.
to use powdered milk:
2 quarts water into a large heavy pan
2 3/4 cups non-instant dry milk or 5 cups instant dry milk
Mix well, a wire whisk works great for this.

Or 2 quarts milk to heavy pan (add 1/2 to 3/4 cup dry milk for thicker yogurt and additional milk protein)
Warm on medium heat to 180 degrees (use a candy thermometer)
Now turn the burner off and allow to cool to 110 degrees

When the milk has cooled to 110 degrees
Add 1/2 to 1 cup yogurt starter
(This is plain yogurt from the store with live active cultures. The yogurt must say live active cultures or it will not work.)

Mix well., put the lid on and set in a warm place to culture. This can take 6 to 8 hours. The longer the tangier.
In the winter I set my pan out by the wood stove it stays all warm and toasty. In the summer I set it out in a bright sunny area where it will stay all warm and cozy. I say warm not hot. I take a thermometer out and set it next to my pan just to make sure it isn't getting too hot. Over 120 degrees and it will kill the cultures and you will just have bad milk.....
This makes a thick, almost Greek style yogurt. You can have for breakfast, put a spoonful on the dogs food, they love it and it is a dairy product they can have and handle, make frozen yogurt, make yogurt cheese, use it as a sour cream replacement. So many wonderful ways to use yogurt!!

Sunday, July 1, 2012
Honey Harvest
Today we harvested some honey.

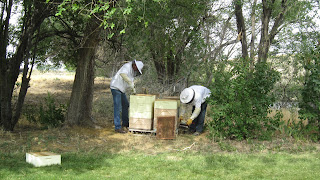


All decked out and getting the smokers going.

I take the pictures from a distance. DH and #1 son do all the heavy lifting. :-)

The bees are really producing.


cutting the caps offf

Into the extractor for a spin - turn around and spin again.
This was a Christmas gift from #2 son and wife. What a WONDERFUL gift! It saves the frames so the bees just have to refill them with honey instead of rebuilding the frame. This means more honey!!
Now my job begins. The guys do the bees and capping etc. but I am the strainer and bottler. It works out well.

After the extractor the honey goes through a fine mesh strainer. This strains out any foreign matter. We only want beautiful clean honey.

This is the strained honey. It is all pure nectar honey.

Strained and in the jars.
YUMMY!!
This is our second honey harvest this season. We should have one or two more.
We have ten hives which gives us enough for our families and some for gifts.
It was a good harvest.
Saturday, June 2, 2012
Inventory the Food Storage

Yesterday was the freezer, today the pantry. A part of food storage is to inventory. It let's you know what you still have, what you need, and how much you use of different items.
canned beans - 16
canned fruit - 9
canned chicken - 8
toothpaste - 3
dental floss - 6
fluoride treatment - 2 bottles
candles -
matches -
lamp oil -
etc...
(I try to purchase when items are on sale. Many times I can purchase enough for the year. By the time I need it it's on sale again.)
It would be wasteful and expensive if you didn't use what you have put by or purchased.
One of the rules of food storage is rotate, rotate, rotate.
The best food storage plan is store what you eat and eat what you store.
Thursday, February 18, 2010
Fondant Recipe
Great Recipe for Fondant
Too cool not to share. If you decorate cakes here is a recipe for fondant; you probably already have everything in your pantry.

Subscribe to:
Posts (Atom)
linkwithin
